
Top 9 Self-Defense Items Every Hiker Should Carry

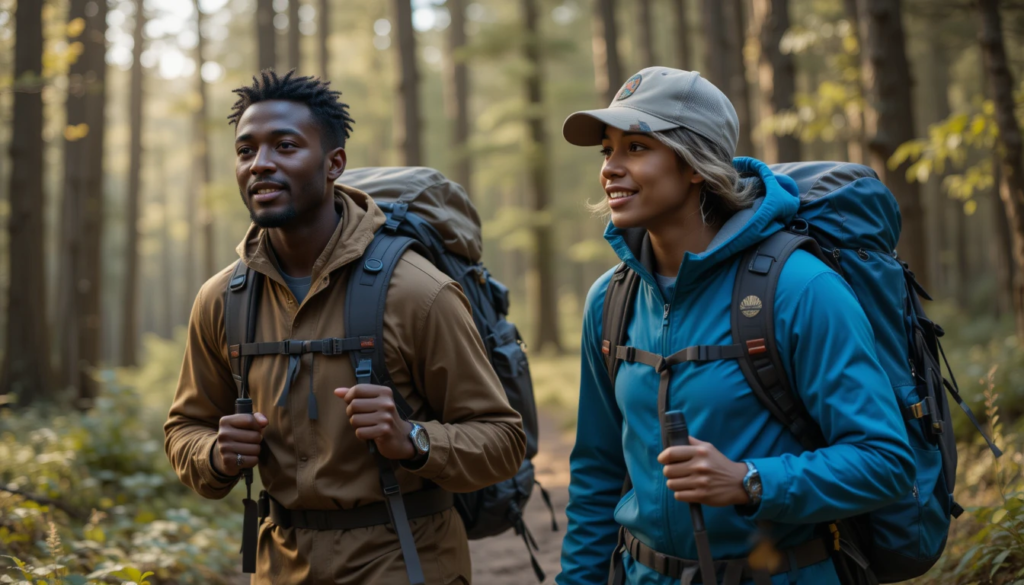
Home About Us Blog Mental Health Decoded Worse Case Scenario Technology Financial Freedom Self Defense featured Podcast Videos Shorts Self Defense Survival Motivation Herbal Remedies Videos Self Defense Survival Motivation Videos Conspiracy Videos Meditation & Relaxation Digital Dojo Digital Dojo Live Shop Self Defense Gear Prepper Gear Survival Garden Ebooks Mugs and Tunblers Stickers and Decals Apparel Supplements Contact Memberships Donations Privacy Policy X Popular Top 9 Self-Defense Items Every Hiker Should Carry Hike smart, stay safe—equip yourself with the right tools before you hit the trail. Hiking is an incredible way to reconnect with nature, challenge yourself, and enjoy the serenity of the outdoors. But whether you’re trekking solo or in a group, being prepared for potential threats—both animal and human—is essential. While staying aware and practicing good situational awareness are key, having the right self-defense items on hand can be the difference between safety and danger. Here’s a list of the best self-defense items for hikers that are lightweight, practical, and effective. 1. Pepper Spray (Bear Spray Variant) The Lightweight Guardian for the Trail Pepper spray is a must-have for hikers. Not only does it give you a non-lethal way to protect yourself, but bear spray variants are designed to handle large predators at a safe distance. Effective against both animals and people Long-range dispersal (especially bear spray: up to 30 feet) Easy to carry—clips onto a backpack or belt Non-lethal but highly disorienting No special training required ✅ Pro Tip: Practice pulling it out quickly—you won’t have time to fumble in an emergency. 2. Personal Alarm / Emergency Whistle Make Noise, Stay Safe Sometimes, the loudest thing in the forest should be you. A high-decibel personal alarm or a reliable whistle can scare off threats and signal for help. Alerts others to your location Can scare off animals or people Lightweight and easy to use Battery-powered alarms often include flashing lights No physical force required—great for any age or ability ✅ Pro Tip: Attach to your shoulder strap or key loop for quick access. 3. Tactical Flashlight Illuminate and Intimidate A tactical flashlight does more than light your path—it can disorient threats or double as a striking weapon in close quarters. High-lumen beam can temporarily blind attackers Beveled edge for striking if needed Durable—waterproof and impact-resistant models available Useful for signaling in low visibility Essential for night hiking or emergencies ✅ Pro Tip: Choose one with adjustable beam settings and a strobe feature. 4. Tactical Hiking Pole Support Meets Self-Defense A good trekking pole helps with stability—but a tactical version adds serious protection. Some come with hidden blades, fire starters, or even stun capabilities. Can be used to fend off animals Hidden compartments for extra tools Helps reduce fatigue on uneven terrain Multi-functional for survival situations Often made with aircraft-grade aluminum ✅ Pro Tip: Know how to use it defensively—consider a basic stick-fighting course. 5. Compact Knife or Multi-Tool The Hiker’s Swiss Army Friend A knife is an essential part of any hiker’s kit. In a pinch, it becomes a self-defense tool—but it also earns its weight in utility. Good for cutting, carving, or protection Fixed blades are stronger for defense Some multi-tools include glass breakers and seatbelt cutters Small enough for daily carry Can assist with first aid, food prep, and shelter building ✅ Pro Tip: Keep it oiled and sharpened—don’t let your blade get dull. 6. Stun Gun / Taser Zap the Threat—Without Going Lethal If legal in your hiking area, stun guns offer immediate incapacitation in close range situations. They’re loud, intimidating, and effective. Disables attacker long enough for escape Audible crackling can be a deterrent Many models fit in a pocket or on a belt Rechargeable options available Some models include built-in flashlights ✅ Pro Tip: Practice using it before your trip—muscle memory matters. 7. Paracord Bracelet or Utility Belt Style Meets Survival Paracord gear isn’t just for looks. These survival tools provide feet of strong cord, hidden fire starters, blades, and more—all on your wrist or waist. Paracord can be used for traps, splints, tying gear, etc. Lightweight and wearable Some include mini blades or flint for fires No batteries required Doubles as fashion and function ✅ Pro Tip: Unravel and rewrap your cord before hitting the trail—make sure it’s usable. 8. Firearm (Where Legal and Trained) The Last Line of Defense For advanced hikers or those in high-risk zones, a firearm may be the ultimate safety measure. It’s not for everyone—but for some, it’s a non-negotiable. Instant stopping power Good deterrent in predator-heavy areas Requires training and licensing Holsters make carry safe and discreet Can also be used for signaling with sound ✅ Pro Tip: Regular range practice and a secure carry system are musts. 9. A Well-Trained Dog Your Four-Legged Security System A good trail dog does more than keep you company—it can sniff out danger, deter attackers, and help alert you to threats long before you see them. Natural deterrent to wild animals and strangers Early warning system with keen senses Can be trained for protection, rescue, or alert Encourages regular breaks and awareness Boosts morale and keeps you grounded ✅ Pro Tip: Pack a dog-specific first aid kit and keep your buddy hydrated. Listen to this article in audio format. Blog 27 Camping & Hiking 0 Decoded 9 EDC 2 featured 0 Financial Freedom 3 Follow on Spotify LEARN MORE ON YOUTUBE! ADVERTISEMENT Click here ADVERTISEMENT Learn More ADVERTISEMENT Learn More ADVERTISEMENT Learn More RELATED POST urbanwarriorsurvival.com 16 April 2025 Blog Self Defense Top 9 Self-Defense Items Every Hiker Should Carry urbanwarriorsurvival.com 16 April 2025 Blog Natural Healing 15 Essential Items Every New Hiker Should Pack urbanwarriorsurvival.com 15 April 2025 Blog Natural Healing Self-Healing for Survival: 10 Essential Techniques to Stay Healthy Off the Grid urbanwarriorsurvival.com 14 April 2025 Blog Self Defense Is Martial Arts Good for Self-Defense and Survival? urbanwarriorsurvival.com 7 April 2025 Blog Decoded How to Survive a Tornado Attack: Preparation, Action, and Aftermath urbanwarriorsurvival.com 1
15 Essential Items Every New Hiker Should Pack
Home About Us Blog Mental Health Decoded Worse Case Scenario Technology Financial Freedom Self Defense featured Podcast Videos Shorts Self Defense Survival Motivation Herbal Remedies Videos Self Defense Survival Motivation Videos Conspiracy Videos Meditation & Relaxation Digital Dojo Digital Dojo Live Shop Self Defense Gear Prepper Gear Survival Garden Ebooks Mugs and Tunblers Stickers and Decals Apparel Supplements Contact Memberships Donations Privacy Policy X Popular 15 Essential Items Every New Hiker Should Pack Don’t hit the trail unprepared—gear up with the right essentials for a safer, more enjoyable hike. Whether you’re hiking a forest trail or exploring a mountain pass, preparation is key—especially for beginners. Here’s a breakdown of 15 essential items that every new hiker should bring along for safety, comfort, and peace of mind. 1. Proper Footwear Your feet are your foundation out on the trail. Investing in a solid pair of hiking boots or trail shoes can prevent injuries, blisters, and unnecessary fatigue. Look for shoes that offer good grip, ankle support, and are already broken in before your hike. Remember—comfortable feet equal a much better hiking experience. 2. Navigation Tools Getting lost on a trail is easier than you might think. Don’t rely solely on your phone’s GPS, especially in remote areas with poor signal. Always carry a physical trail map and a compass, and consider downloading offline maps on your smartphone or a GPS device. Knowing how to read them is just as important as bringing them. 3. Hydration Water is non-negotiable on any hike. Even a short trail can leave you feeling dehydrated, especially under the sun or at higher altitudes. Bring at least 2 liters of water, and if you’re going for a longer trek, consider adding a lightweight water filter or purification tablets in case you need to refill from natural sources. 4. Snacks & Lightweight Nutrition Hiking burns more calories than you may realize. Fuel your body with high-energy, non-perishable snacks like trail mix, energy bars, dried fruits, or jerky. These foods are lightweight, easy to pack, and give you the boost you need to keep moving, especially on long or strenuous hikes. 5. Layered Clothing Weather in nature can change fast—sunny mornings can turn into chilly afternoons or sudden rain. Dressing in layers gives you the flexibility to adapt. Start with a moisture-wicking base layer, add an insulating layer like fleece or a down jacket, and finish with a waterproof/windproof outer shell. 6. First Aid Kit Even on easy trails, accidents happen. A compact first aid kit should include adhesive bandages, antiseptic wipes, moleskin for blisters, tweezers, medical tape, and basic medications like painkillers or antihistamines. You don’t need to be a medic—but being able to treat a scrape or blister can make a huge difference. 7. Sun Protection UV rays can be intense at higher elevations or even on cloudy days. Always pack sunscreen (SPF 30 or higher), sunglasses with UV protection, and a hat to shield your face and neck. Protecting yourself from sunburn and heat exhaustion keeps your body strong and your hike enjoyable. 8. Emergency Shelter In the rare case you get stranded or delayed, having an emergency shelter can be life-saving. Lightweight options like a space blanket, bivvy sack, or emergency tarp don’t take up much space but can protect you from wind, rain, and cold if you’re stuck overnight. 9. Headlamp or Flashlight Darkness falls quickly in the woods, and you don’t want to be caught fumbling for your way out. A headlamp allows for hands-free lighting, making it easier to hike, cook, or set up camp after sundown. Always pack extra batteries, and don’t rely solely on your phone’s flashlight—it drains your battery fast. 10. Multi-tool or Knife A small multi-tool or hiking knife is incredibly useful for everything from cutting rope and opening snacks to gear repair or first aid. Choose one with a few basic functions like a blade, scissors, tweezers, and a screwdriver. You don’t need a bulky survival tool—just something reliable and compact. 11. Bug Protection Insects can turn a great hike into an itchy nightmare. Bug spray with DEET or natural alternatives like citronella can help repel mosquitoes, ticks, and flies. Wearing long sleeves and pants in buggy areas provides additional protection, especially during dusk or near water sources. 12. Backpack You’ll need something to carry all your gear, and a comfortable, well-fitted backpack makes all the difference. For day hikes, a pack with a 15–30 liter capacity is usually enough. Look for padded shoulder straps, a supportive hip belt, and compartments to keep things organized and accessible. 13. Trash Bag or Ziplock Part of responsible hiking is leaving the trail better than you found it. Bring a small trash bag or ziplock to pack out all your waste, including food wrappers, tissues, or biodegradable waste. “Leave no trace” isn’t just a motto—it’s how we preserve the wilderness for others. 14. Personal Identification & Emergency Info Always carry some form of ID and a card with emergency contact information, medical conditions, and any allergies. You can keep this in a waterproof sleeve or ziplock bag. It’s a small step that can make a huge difference if something goes wrong. 15. Optional but Useful: Trekking Poles While not necessary for everyone, trekking poles can help with balance, reduce strain on knees during descents, and make uphill climbs easier. They’re especially useful on rocky or uneven terrain. Look for collapsible poles if you want to pack light. Final Tips for First-Timers: Start with shorter trails: Choose beginner-friendly hikes until you get more comfortable with your gear and pace. Check the weather forecast: Always know what conditions to expect before you head out. Tell someone your plan: Let a friend or family member know your route and when you plan to return. Stay on marked trails: Don’t try to blaze your own trail—stick to official paths for safety. Conclusion: Hiking doesn’t require a ton of gear, but the right items can mean the difference between a fun day in
Self-Healing for Survival: 10 Essential Techniques to Stay Healthy Off the Grid
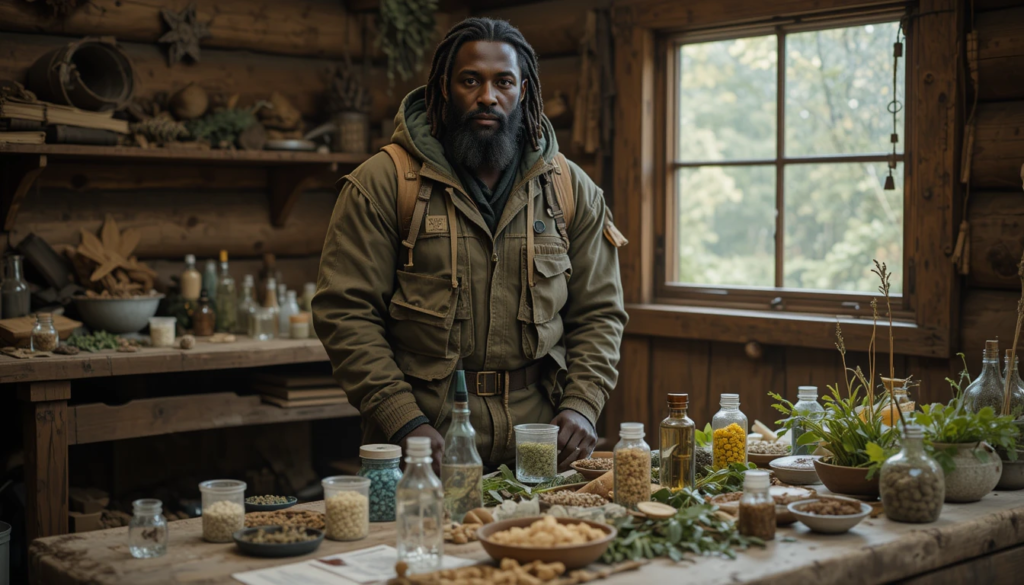
Home About Us Blog Mental Health Decoded Worse Case Scenario Technology Financial Freedom Self Defense featured Podcast Videos Shorts Self Defense Survival Motivation Herbal Remedies Videos Self Defense Survival Motivation Videos Conspiracy Videos Meditation & Relaxation Digital Dojo Digital Dojo Live Shop Self Defense Gear Prepper Gear Survival Garden Ebooks Mugs and Tunblers Stickers and Decals Apparel Supplements Contact Memberships Donations Privacy Policy X Popular Self-Healing for Survival: 10 Essential Techniques to Stay Strong Off the Grid Heal yourself, strengthen your mind, and reclaim your power—wherever you are When you live off the grid or embrace the survivalist lifestyle, you trade convenience for independence. That means no quick trips to the doctor, no stocked pharmacies, and no backup plans—just you, your knowledge, and your will to survive. In this world, self-healing isn’t just a skill. It’s a way of life. Whether you’re recovering from injury, managing stress, or fighting illness, these self-healing techniques can help you stay strong, resilient, and in control of your health. 1. Herbal First Aid Nature provides everything we need to heal—if we know where to look. Herbal first aid is a cornerstone of off-grid survival. For example, yarrow can be used to stop bleeding and disinfect wounds. Simply crush the leaves and apply them directly to the cut. Plantain, often dismissed as a weed, is excellent for pulling out toxins from insect stings or snake bites. Mash the leaves into a poultice and wrap it on the affected area. Echinacea, found in many wild regions, strengthens the immune system and can help fight off infections. Learning to identify, harvest, and prepare these plants could literally save your life. 2. Breathwork and Conscious Breathing Breath is your most powerful tool—and it’s free. Practicing breathwork helps regulate your nervous system, reduce stress, and increase oxygen flow, which promotes healing throughout the body. Techniques like box breathing (inhale for 4 seconds, hold for 4, exhale for 4, hold again for 4) can calm your mind and reduce anxiety in high-stress survival situations. For deeper healing, Wim Hof breathing—a series of deep, rhythmic inhales followed by breath holds—can improve circulation, strengthen your immune response, and help you mentally power through pain or discomfort. 3. Cold Water Therapy Survival situations don’t come with hot tubs. But cold water therapy, even in rivers or streams, can be a game-changer. Cold exposure reduces inflammation, improves mood, and builds mental resilience. Start by splashing cold water on your face and working up to full immersion in cold natural water. Short, controlled exposure boosts circulation and trains your body to adapt to extreme conditions. Over time, it can improve your tolerance to cold, enhance healing, and even increase your pain threshold. 4. Self-Massage and Pressure Points When you’re sore, injured, or dealing with tension, your hands can be your medicine. Learn basic self-massage techniques to improve blood flow and relieve pain. Focus on areas like the neck, shoulders, and lower back—common spots for tension, especially when carrying gear or sleeping rough. Pressure points, such as the LI-4 point between your thumb and index finger, can be used to relieve headaches or nausea. Understanding how to use your own body for pain relief keeps you mobile and functional, even when resources are scarce. 5. Fasting for Healing Sometimes, eating less is the path to more energy and clarity. Intermittent fasting or even extended fasts (done safely) allow the body to enter a state of autophagy—a cellular cleanup process that removes damaged cells and regenerates new ones. In survival situations where food is limited, fasting can actually support healing rather than hinder it. The body becomes more efficient, inflammation decreases, and mental clarity improves. Always do your research or practice under guidance if you’re new to fasting. 6. Grounding (Earthing) Walking barefoot on the earth isn’t just for hippies—it’s science. Grounding, or making direct contact with the earth, helps balance your body’s electrical charge. Studies suggest grounding can reduce inflammation, improve sleep, and speed up recovery from injuries. In a survival setting, take time each day to remove your shoes and stand or walk on natural surfaces like grass, dirt, or sand. It helps regulate your circadian rhythm and reconnects you with the natural world, both physically and mentally. 7. Meditation and Visualization Your mental state is just as important as your physical health in a survival situation. Meditation improves focus, calms anxiety, and reduces the physical effects of stress on the body. Even five minutes of quiet breathing and mental stillness can bring clarity in chaos. Visualization techniques—like mentally walking through a healing process or imagining your body repairing itself—can actually trigger physiological responses that support recovery. The mind is a powerful ally—use it wisely. 8. Natural Poultices and Clays Wild clays and homemade poultices can work wonders. Bentonite clay, if available, pulls toxins and bacteria from the skin. In the wild, clean natural clays can be used in emergency situations to treat bites, burns, or skin infections. Combine clay with herbs like comfrey or calendula to make a healing poultice. Wrap it on wounds or swollen areas with a natural bandage like plantain leaves or cloth. This age-old technique has been used by healers across cultures for generations. 9. Energy Work (Qi Gong, Reiki, Hands-On Healing) Not everything that heals can be seen. Qi Gong, an ancient Chinese practice, combines slow movements, breath control, and mental focus to direct energy through the body. Reiki and other forms of energy work use intention and light touch to encourage healing at a subtle level. You don’t need formal training to benefit—just placing your hands over an injury and focusing your intention on healing can produce real results. In a world where physical tools may be limited, your own energy may be the most powerful tool you have. 10. Solar and Moon Healing Harnessing the elements includes light itself. Sunlight provides vitamin D, essential for immune function, bone health, and mental well-being. Try sunbathing safely during early morning or late afternoon hours to avoid harsh
Is Martial Arts Good for Self-Defense and Survival?

Home About Us Blog Mental Health Decoded Worse Case Scenario Technology Financial Freedom Self Defense featured Podcast Videos Shorts Self Defense Survival Motivation Herbal Remedies Videos Self Defense Survival Motivation Videos Conspiracy Videos Meditation & Relaxation Digital Dojo Digital Dojo Live Shop Self Defense Gear Prepper Gear Survival Garden Ebooks Mugs and Tunblers Stickers and Decals Apparel Supplements Contact Memberships Donations Privacy Policy X Popular Is Martial Arts Good for Self-Defense and Survival? Train your body, sharpen your mind — fight for your survival. When most people think of martial arts, they picture high-flying kicks, clean uniforms, and disciplined bowing in a dojo. But in the context of self-defense and survival, the question becomes more raw and real: Can martial arts actually help you protect yourself in life-or-death situations? Let’s break it down. The Pros of Martial Arts for Self-Defense and Survival 1. Improved Situational Awareness Martial arts training sharpens your senses. You become more aware of your surroundings and people’s intentions. That alone can help you avoid trouble before it starts — one of the most underrated self-defense tools. 2. Confidence Under Pressure Knowing how to fight helps you stay calm when adrenaline spikes. That composure is everything in high-stress survival situations, whether it’s a mugging, riot, or natural disaster. 3. Physical Conditioning Martial artists tend to be more flexible, stronger, and faster. In survival scenarios, the ability to run, climb, or fight back could mean the difference between life and death. 4. Discipline & Mental Fortitude The mindset developed in martial arts — pushing through pain, thinking clearly under stress, staying calm — transfers directly to survival. That kind of mental edge is hard to teach any other way. 5. Hands as Weapons When you don’t have a knife or firearm, your fists, elbows, knees, and even your voice become your tools. Martial arts like Muay Thai, Krav Maga, and Brazilian Jiu-Jitsu focus on real-world applications. The Cons of Martial Arts for Self-Defense and Survival 1. Not All Martial Arts Are Equal Some styles are more sport-based (like Tae Kwon Do or point-based Karate) and may not prepare you for a street fight. Others, like Krav Maga or Filipino Kali, are designed for real-world combat. Choose wisely. 2. Overconfidence Can Be Dangerous Some martial artists develop a false sense of security, thinking a black belt makes them invincible. That attitude can get you hurt fast, especially against someone with a weapon or zero rules. 3. Time and Money Training takes years and often costs thousands. For someone prepping for survival, that time might be better spent on firearms training, first aid, or food security — depending on your priorities. 4. Limited Against Armed or Multiple Attackers No matter how good you are, martial arts can only take you so far against a knife, gun, or group ambush. Martial arts should be one part of a broader self-defense toolkit. The Verdict: Martial Arts Is a Tool — Not a Cure-All Martial arts can absolutely help with self-defense and survival. It builds mindset, fitness, and physical capability. But it’s not magic. You still need street smarts, gear, and the willingness to walk away when possible. The key is integration: pair martial arts with tactical training, situational awareness, and survival skills. Think of it as sharpening your blade — but always have a backup plan. Best Martial Arts for Survival & Self-Defense: Krav Maga – Military-grade efficiency Brazilian Jiu-Jitsu (BJJ) – Control without striking Muay Thai – Devastating strikes and clinch game Boxing – Fast hands and footwork Filipino Kali/Escrima – Knife, stick, and hand-to-hand skills Judo – Throws and takedown defense Final Thoughts Martial arts won’t make you a superhero — but it will give you tools that could save your life.If you’re serious about self-defense and survival, start training — and train for reality, not the mat. Listen to this article in audio format. Blog 24 Decoded 9 EDC 2 featured 0 Financial Freedom 3 Gardening 2 Follow on Spotify LEARN MORE ON YOUTUBE! ADVERTISEMENT Click here ADVERTISEMENT Learn More ADVERTISEMENT Learn More ADVERTISEMENT Learn More RELATED POST urbanwarriorsurvival.com 14 April 2025 Blog Self Defense Is Martial Arts Good for Self-Defense and Survival? urbanwarriorsurvival.com 7 April 2025 Blog Decoded How to Survive a Tornado Attack: Preparation, Action, and Aftermath urbanwarriorsurvival.com 1 April 2025 Blog Decoded How to Use Visualization to Overcome Fear For Survival urbanwarriorsurvival.com 31 March 2025 Blog Decoded Is the System Broken? The Illusion of the American Dream urbanwarriorsurvival.com 28 March 2025 Blog Prepping survival gear How to Incorporate Trade and Barter into Your Business urbanwarriorsurvival.com 27 March 2025 Blog Prepping survival gear Frelaxy Dry Bag Review: The Ultimate Waterproof Gear for Survivalists Address List 123, Any Street NorthYour City NameCountry Name. P.O 3554 +1 234 567 8902 Urban Warrior Survival Social Networks Facebook Twitter Instagram B.Roc Survival Podcast Discord Patreon Pinterest Youtube Links List Help Center Community Forums Blog Meetups B.Roc Survival Inc. All rights reserved
How to Survive a Tornado Attack: Preparation, Action, and Aftermath

Home About Us Blog Mental Health Decoded Worse Case Scenario Technology Financial Freedom Self Defense featured Podcast Videos Shorts Self Defense Survival Motivation Herbal Remedies Videos Self Defense Survival Motivation Videos Conspiracy Videos Meditation & Relaxation Digital Dojo Digital Dojo Live Shop Self Defense Gear Prepper Gear Ebooks Mugs and Tunblers Stickers and Decals Apparel Phone Cases Contact Memberships Donations Privacy Policy X Popular How to Survive a Tornado Attack: Preparation, Action, and Aftermath Be the storm’s survivor, not its victim. Introduction: When the Sky Turns Against You Tornadoes are nature’s most violent storms. Spawning from powerful thunderstorms, they can strike with little warning and leave behind a trail of devastation. In a matter of seconds, an entire neighborhood can be reduced to rubble. That’s why knowing how to prepare, react, and recover from a tornado isn’t optional—it’s survival 101. Whether you live in Tornado Alley or just want to be ready for anything, this guide will give you a solid plan to stay alive and protect what matters most. 1. Preparation: The Key to Surviving Before the Winds Hit Know Your Risk Zone First, understand your geographical vulnerability. Tornadoes are most common in parts of the U.S., such as Oklahoma, Kansas, Texas, and Missouri, but they can form almost anywhere under the right conditions. Check your area’s tornado frequency and history so you’re not caught off guard. Create a Tornado Emergency Plan Every survivalist knows that a plan is power. Designate a safe room or storm shelter in your home—preferably a basement, interior bathroom, or hallway on the lowest level, far from windows. If you live in a mobile home or RV, plan to get to a permanent shelter ahead of time. Everyone in your household should know the route and drill it like your life depends on it—because it does. Build a Tornado Survival Kit Your kit should be compact, waterproof, and within arm’s reach in your designated shelter. Include: A weather radio (hand-crank or battery-powered) Flashlights and extra batteries First aid kit Bottled water and non-perishable food (3-day supply minimum) Personal documents in a waterproof bag Whistle, dust mask, multi-tool Blankets or emergency mylar sheets Sturdy shoes and gloves This isn’t just about convenience—it’s about increasing your odds in the hours after the tornado hits. 2. During the Tornado: What To Do When Seconds Count Heed Warnings Immediately If you hear a tornado siren or get an alert on your phone or NOAA radio, do not delay. Warnings can come just minutes before impact. Don’t go outside to “see” the storm—many tornadoes are rain-wrapped or happen at night, making them invisible until it’s too late. Take Cover Fast If you’re home: Go to your designated shelter room immediately. Get under something sturdy (like a heavy table or mattress) to shield yourself from falling debris. Protect your head and neck with your arms, a helmet, or even couch cushions. If you’re driving: Never try to outrun a tornado unless you can clearly drive at right angles to its path and escape the area. If possible, park the car, get out, and lie flat in a ditch or low-lying area, covering your head. Avoid overpasses—they create wind tunnels that can suck you out or crush you with debris. If you’re outdoors or in a mobile home: Get to the nearest permanent structure or underground shelter immediately. Mobile homes are not safe. Period. 3. After the Tornado: Survive the Aftermath Stay Alert and Avoid Hazards Tornadoes might come in groups or be followed by dangerous weather. Stay tuned to emergency broadcasts until the all-clear is officially given. Watch out for: Downed power lines (don’t touch anything wet or metallic near them) Gas leaks (if you smell gas, evacuate immediately) Broken glass and unstable structures Do a headcount if you’re with others, and treat injuries as best you can until help arrives. Communicate Wisely Use text messages or social media to check in with loved ones—this keeps emergency lines open for true emergencies. Keep your phone charged with a solar power bank or backup battery in your survival kit. Document Damage (If Safe) Take photos of any damage to your home or property. This can help with insurance claims later. But remember—your safety comes first. Conclusion: You Can’t Stop the Storm, But You Can Survive It Tornadoes don’t care how tough you are or how much warning you get. Survival comes down to preparation, quick thinking, and having the right gear and knowledge before disaster strikes. The more you plan, the less you’ll panic. And in the world of survival, panic is the real killer. So get your plan in place today—because tomorrow might be too late. Listen to this article in audio format. Blog 23 Decoded 9 EDC 2 featured 0 Financial Freedom 3 Gardening 2 Follow on Spotify LEARN MORE ON YOUTUBE! ADVERTISEMENT Click here ADVERTISEMENT Learn More ADVERTISEMENT Learn More ADVERTISEMENT Learn More RELATED POST urbanwarriorsurvival.com 7 April 2025 Blog Decoded How to Survive a Tornado Attack: Preparation, Action, and Aftermath urbanwarriorsurvival.com 1 April 2025 Blog Decoded How to Use Visualization to Overcome Fear For Survival urbanwarriorsurvival.com 31 March 2025 Blog Decoded Is the System Broken? The Illusion of the American Dream urbanwarriorsurvival.com 28 March 2025 Blog Prepping survival gear How to Incorporate Trade and Barter into Your Business urbanwarriorsurvival.com 27 March 2025 Blog Prepping survival gear Frelaxy Dry Bag Review: The Ultimate Waterproof Gear for Survivalists urbanwarriorsurvival.com 26 March 2025 Blog Worse Case Scenario How to Find and Purify Water When Taps Stop Running Address List 123, Any Street NorthYour City NameCountry Name. P.O 3554 +1 234 567 8902 Urban Warrior Survival Social Networks Facebook Twitter Instagram B.Roc Survival Podcast Discord Patreon Pinterest Youtube Links List Help Center Community Forums Blog Meetups B.Roc Survival Inc. All rights reserved
How to Use Visualization to Overcome Fear For Survival

Home About Us Blog Mental Health Decoded Worse Case Scenario Technology Financial Freedom Self Defense featured Podcast Videos Shorts Self Defense Survival Motivation Herbal Remedies Videos Self Defense Survival Motivation Videos Conspiracy Videos Meditation & Relaxation Digital Dojo Digital Dojo Live Shop Self Defense Gear Prepper Gear Ebooks Mugs and Tunblers Stickers and Decals Apparel Phone Cases Contact Memberships Donations Privacy Policy X Popular How to Use Visualization to Overcome Fear Master your mind, conquer your fear—visualize success before it happens. Fear is a natural response to the unknown, danger, or uncertainty. However, if left unchecked, it can become a crippling force that prevents you from taking action or thinking clearly. Whether you’re preparing for a survival situation, facing a personal challenge, or dealing with everyday anxieties, visualization is a powerful tool to rewire your mind and conquer fear. By using mental imagery, you can train your brain to react more calmly in high-stress situations, build confidence, and transform fear into focused action. Here’s how you can harness the power of visualization to overcome fear. 1. Understand How Visualization Works Visualization is more than just daydreaming—it’s a mental training technique that allows you to rehearse situations before they happen. When you visualize yourself successfully handling a fear-inducing scenario, your brain activates the same neural pathways as if you were actually experiencing it. This process strengthens your ability to respond with confidence when faced with real-life challenges. Why It Works: Neural Conditioning: The brain doesn’t differentiate between imagined and real experiences, meaning repeated visualization can program your mind for success. Emotional Regulation: Imagining a calm response to fear helps train your nervous system to stay composed under pressure. Increased Preparedness: By mentally rehearsing different scenarios, you improve problem-solving skills and reduce the likelihood of freezing in fear. Understanding how visualization rewires your brain is the first step in using it to your advantage. 2. Identify Your Specific Fears Before you can use visualization effectively, you need to pinpoint what exactly you’re afraid of. Fear often stems from uncertainty, lack of control, or past negative experiences. By defining your fears, you can create targeted mental exercises to address them. How to Identify Your Fears: Write down situations that make you anxious or fearful. Ask yourself what specifically triggers the fear—is it the unknown, failure, pain, or something else? Determine how this fear impacts your actions and decision-making. Once you have clarity on what you’re afraid of, you can start visualizing ways to overcome it. 3. Create a Mental Blueprint for Success Now that you know what you’re dealing with, it’s time to craft a mental movie of yourself successfully facing and overcoming your fear. This isn’t about wishful thinking—it’s about training your mind to expect a positive outcome rather than focusing on worst-case scenarios. Steps to Build Your Visualization: Find a Quiet Space: Sit or lie down in a relaxed position where you won’t be disturbed. Close Your Eyes and Breathe Deeply: Use controlled breathing to calm your nervous system. Imagine the Fear-Inducing Situation: Picture yourself entering the situation that typically causes fear. Visualize a Strong, Confident Response: See yourself handling the situation calmly and effectively. Imagine feeling strong, collected, and capable. Engage All Your Senses: What do you see, hear, and feel? The more realistic the visualization, the more effective it will be. End with a Positive Outcome: Conclude your mental exercise with a victory—whether it’s successfully completing a challenge, escaping danger, or simply remaining calm. Repeating this visualization daily helps condition your brain to respond with confidence rather than panic. 4. Use Repetitive Mental Rehearsal Just as athletes practice their sport repeatedly before a competition, you must mentally rehearse overcoming fear consistently. The more you repeat a visualization, the stronger the neural connections become. How to Strengthen Mental Rehearsal: Visualize success every day, especially before facing real challenges. Increase the intensity of your visualizations by imagining more detailed scenarios. Combine visualization with physical actions, such as practicing controlled breathing or clenching your fists to reinforce the feeling of power. With regular mental rehearsal, fear becomes less intimidating, and confidence becomes second nature. 5. Combine Visualization with Physical Action While visualization is a powerful tool, it becomes even more effective when paired with real-world action. Your brain thrives on consistency between what it imagines and what it experiences. By practicing controlled exposure to your fears while reinforcing positive visualization, you accelerate your ability to overcome them. How to Integrate Action: Start Small: If public speaking scares you, practice in front of a mirror while visualizing a successful speech. Simulate Real Scenarios: If you’re training for a survival situation, physically act out your visualized plan. Track Progress: Keep a journal to record how visualization is helping you handle fear in real situations. By bridging the gap between mental training and real-world experience, you build lasting confidence. 6. Replace Negative Visualizations with Positive Ones Many people struggle with fear because they unconsciously engage in negative visualization—constantly imagining worst-case scenarios. This negative thinking reinforces anxiety and panic. By actively replacing fearful images with positive ones, you take control of your mental narrative. Strategies to Reframe Negative Thoughts: Catch Yourself in Negative Visualizations: If you notice yourself imagining failure or danger, pause and redirect your thoughts. Immediately Replace the Image: Instead of picturing yourself failing, visualize yourself succeeding. Use Affirmations Alongside Visualization: Phrases like “I am in control” or “I can handle this” reinforce a positive mindset. Over time, replacing fear-based imagery with empowering visualization rewires your brain for resilience. 7. Visualize Past Successes to Build Confidence Your brain loves patterns—when you remind yourself of past successes, it strengthens your belief that you can handle new challenges. Recalling moments when you overcame adversity can boost your ability to face future fears. How to Use Past Successes: Close your eyes and recall a time when you successfully handled a tough situation. Replay that memory in your mind, focusing on the emotions and actions that led to success.
Is the System Broken? The Illusion of the American Dream

Home About Us Blog Mental Health Decoded Worse Case Scenario Technology Financial Freedom Self Defense featured Podcast Videos Shorts Self Defense Survival Motivation Herbal Remedies Videos Self Defense Survival Motivation Videos Conspiracy Videos Meditation & Relaxation Digital Dojo Digital Dojo Live Shop Self Defense Gear Prepper Gear Ebooks Mugs and Tunblers Stickers and Decals Apparel Phone Cases Contact Memberships Donations Privacy Policy X Popular How to Incorporate Trade and Barter into Your Business The system isn’t broken, it was built this way! For decades, we’ve been programmed to believe in the American system—a land of opportunity where hard work leads to success, justice prevails, and democracy ensures fairness. But as more people wake up to reality, the cracks in this illusion become impossible to ignore. The system isn’t just broken—it was never designed to serve the people in the first place. In particular, Black Americans and other marginalized communities have faced systemic barriers that make upward mobility nearly impossible. 1. The Illusion of Democracy We’re told that voting gives us power, that we have a say in how the country is run. But in reality, the system is designed to maintain the status quo. Consider the following: Corporate Influence: Lobbyists and corporate interests control political decisions, ensuring that policies benefit the wealthy rather than the working class. Two-Party Monopoly: Both major political parties serve the same elite interests, making real change nearly impossible through traditional voting. Voter Suppression: From gerrymandering to restrictive voter ID laws, Black communities have been systematically disenfranchised to limit their political power. Media Manipulation: The mainstream media shapes public opinion, controlling the narrative and keeping people distracted from systemic corruption. While voting is often presented as the key to change, the reality is that true power lies in economic independence, self-sufficiency, and community-building beyond the political system. 2. The Financial Trap: Modern-Day Slavery The American Dream promises financial freedom, but the system is built to keep most people—especially Black Americans—trapped in economic struggle: Wage Stagnation: While the cost of living has skyrocketed, wages have remained largely stagnant. Black workers, in particular, continue to face wage disparities and job discrimination. Predatory Lending: Black families were disproportionately targeted with subprime mortgage loans, leading to the 2008 housing crisis, which wiped out much of the Black middle class’s wealth. Generational Wealth Barriers: Due to historical redlining, segregation, and discriminatory policies, Black families have had fewer opportunities to accumulate generational wealth. Education as a Debt Trap: Young people, especially from low-income communities, are encouraged to take on massive student loan debt for degrees that don’t guarantee financial success. This system was never about creating wealth for everyone—it was about maintaining economic control over the masses. 3. Healthcare: A Profit-Driven Industry That Targets the Vulnerable Unlike other developed nations, America treats healthcare as a business rather than a human right. This disproportionately affects Black and low-income communities in multiple ways: Medical Racism: Studies show that Black patients are often undertreated for pain, ignored when seeking care, and given lower-quality treatment compared to white patients. Food and Drug Industries: Unhealthy, processed foods are heavily marketed to low-income communities, creating a cycle of poor health that benefits the pharmaceutical industry. Health Insurance Gaps: Even with government programs, many Black Americans face significant barriers to accessing quality healthcare due to employment discrimination and financial instability. Rather than prioritizing public health, the system ensures that sickness remains a profitable industry. 4. The Prison-Industrial Complex: Modern-Day Jim Crow The “land of the free” has the highest incarceration rate in the world, with Black Americans disproportionately affected: Mass Incarceration: Black Americans make up a significant portion of the prison population despite not committing crimes at a higher rate. Private Prisons: The prison industry profits from keeping cells full, with companies using prison labor for cheap production. School-to-Prison Pipeline: Over-policing in schools, harsher punishments for Black children, and systemic neglect contribute to an increased likelihood of incarceration. Lifetime Consequences: A criminal record makes it difficult to find employment, vote, or secure housing, keeping Black men and women trapped in a cycle of poverty. This system was never about justice—it was about control and profit. 5. The Education System: Indoctrination, Not Empowerment Instead of teaching financial literacy, critical thinking, or real-world skills, public schools focus on obedience and outdated curricula: Lack of Financial Education: Students are not taught how to build wealth, start businesses, or manage money effectively. Rewritten History: The history of slavery, colonialism, and systemic racism is often watered down or omitted altogether. Defunding Public Schools: Schools in predominantly Black and low-income areas receive less funding, leading to poor resources and limited opportunities for success. An educated and financially literate population is a threat to those in power—so the system ensures that critical knowledge is withheld. 6. The Surveillance State: The Digital Plantation We’re led to believe we have privacy and freedom, but the truth is: Mass Surveillance: Social media, smartphones, and smart devices constantly monitor and track personal data. Censorship of Dissent: Alternative viewpoints are suppressed, particularly those that challenge systemic corruption. Predictive Policing: AI and data-driven policing disproportionately target Black communities, reinforcing systemic biases. Freedom is an illusion when every move you make is watched, recorded, and used to maintain control. So, What’s the Solution? The first step is recognizing the truth: the system isn’t broken—it works exactly as it was designed, just not in our favor. Instead of trying to fix it, we need to break free from it: ✅ Become self-sufficient (grow food, learn survival skills, and build local support networks). ✅ Create multiple income streams (side hustles, entrepreneurship, and investments to escape financial dependence). ✅ Question mainstream narratives and seek alternative knowledge from independent sources. ✅ Build strong local communities to share resources and support outside of the system’s control. The American Dream was always a carefully crafted illusion. The real dream? Living on your own terms. Are you ready to wake up? Listen to this article in audio format. Blog 21
How to Incorporate Trade and Barter into Your Business

Home About Us Blog Mental Health Decoded Worse Case Scenario Technology Financial Freedom Self Defense featured Podcast Videos Shorts Self Defense Survival Motivation Herbal Remedies Videos Self Defense Survival Motivation Videos Conspiracy Videos Meditation & Relaxation Digital Dojo Digital Dojo Live Shop Self Defense Gear Prepper Gear Ebooks Mugs and Tunblers Stickers and Decals Apparel Phone Cases Contact Memberships Donations Privacy Policy X Popular How to Incorporate Trade and Barter into Your Business Unlock the power of barter to grow your business without cash. In a world dominated by digital transactions and complex financial systems, the ancient practice of barter remains a powerful tool for businesses looking to maximize resources, save money, and build strong relationships. Whether you’re a small business owner, freelancer, or entrepreneur, bartering can be an effective way to acquire what you need without spending cash. This guide will walk you through the benefits of trade and barter, practical ways to implement it, and how to avoid potential pitfalls. Why Incorporate Bartering into Your Business? Bartering isn’t just a last-resort strategy—it’s a smart business move. Here are some key reasons to integrate barter into your operations: 1. Cost Savings One of the most obvious advantages of bartering is reducing cash expenses. By trading goods or services directly, businesses can save money on essential resources while keeping financial liquidity intact. 2. Stronger Business Relationships Exchanging goods and services fosters collaboration and trust between businesses. It creates long-term partnerships and a network of reliable contacts who can support your business in various ways. 3. Maximizing Idle Resources Every business has some underutilized assets, whether it’s excess inventory, unused office space, or available service hours. Bartering allows you to put these resources to good use without losing value. 4. Market Expansion Trading with other businesses can introduce you to new customers and markets. If you provide a service in exchange for another, you may get exposure to a whole new client base through your trade partners. 5. Sustainability and Resourcefulness Bartering promotes a more sustainable way of doing business by reducing waste and encouraging the efficient use of goods and services. How to Implement Bartering in Your Business 1. Identify What You Can Offer Before engaging in barter, take inventory of your goods and services. Ask yourself: What products or services do I have in surplus? Do I have skills or expertise that others might find valuable? Are there things I could offer during slow business periods? For example, if you run a graphic design business, you could offer branding services in exchange for professional photography. If you own a café, you could trade meals for marketing help. 2. Determine What You Need Once you know what you can offer, make a list of what your business needs. Common bartered items include: Marketing and advertising services Office space or storage Professional consulting Equipment and tools Website development and IT support The key is to match your needs with businesses that provide those services and may benefit from what you have to offer. 3. Find Trade Partners There are several ways to connect with potential barter partners: Local Business Networks: Many small business communities have barter-friendly entrepreneurs. Industry Events and Trade Shows: These gatherings are excellent for finding like-minded business owners. Online Barter Platforms: Websites like BarterOnly, Trade Exchange Network, and BizX facilitate business-to-business bartering. Social Media and Forums: Business networking groups on platforms like Facebook and LinkedIn can help you find trade partners. 4. Negotiate Fair Exchanges Bartering works best when both parties feel they are receiving equal value. To ensure a fair exchange: Clearly define what is being exchanged. Assign a dollar value to each item or service to keep the trade balanced. Discuss expectations, timelines, and deliverables in advance. Put the agreement in writing to avoid misunderstandings. For example, if you trade website design for bookkeeping services, clarify how many hours of work each party will provide. 5. Use Barter Exchanges for More Flexibility A barter exchange is a third-party network that facilitates bartering among multiple businesses. Instead of direct one-on-one trades, members earn barter credits, which they can use with any business in the network. This allows for more flexibility and a wider range of trading options. Popular barter exchanges include: ITEX International Monetary Systems (IMS) Bartercard Avoiding Common Bartering Pitfalls 1. Unequal Value Exchange Make sure both parties are getting fair value. If one side feels shortchanged, the relationship may sour. Always establish clear terms and dollar-value assessments. 2. Legal and Tax Considerations Barter transactions are taxable in many regions. The IRS and other tax agencies require businesses to report barter income. Keep records and consult with an accountant to ensure compliance. 3. Quality and Fulfillment Issues Since no money is involved, some businesses might not take barter agreements as seriously as paid contracts. Set clear deadlines and expectations to prevent delays or subpar work. 4. Limited Barter Opportunities Not all businesses are open to bartering. If you struggle to find trade partners, joining a barter network or offering a hybrid payment model (part cash, part barter) may help. Conclusion Incorporating trade and barter into your business can be a game-changer, providing cost savings, new opportunities, and stronger relationships. By understanding your resources, finding the right partners, and structuring fair agreements, you can unlock the full potential of bartering. Whether through direct exchanges or barter networks, this ancient practice remains a valuable tool in the modern economy. Are you ready to start bartering in your business? Share your experiences or questions in the comments! Listen to this article in audio format. Blog 20 Decoded 6 EDC 2 featured 0 Financial Freedom 3 Gardening 2 Follow on Spotify LEARN MORE ON YOUTUBE! ADVERTISEMENT Click here ADVERTISEMENT Learn More ADVERTISEMENT Learn More ADVERTISEMENT Learn More RELATED POST urbanwarriorsurvival.com 28 March 2025 Blog Prepping survival gear How to Incorporate Trade and Barter into Your Business urbanwarriorsurvival.com 27 March 2025 Blog Prepping survival gear Frelaxy Dry Bag Review: The Ultimate Waterproof Gear for Survivalists urbanwarriorsurvival.com 26 March
Frelaxy Dry Bag Review: The Ultimate Waterproof Gear for Survivalists
Home About Us Blog Mental Health Decoded Worse Case Scenario Technology Financial Freedom Self Defense featured Podcast Videos Shorts Self Defense Survival Motivation Herbal Remedies Videos Self Defense Survival Motivation Videos Conspiracy Videos Meditation & Relaxation Digital Dojo Digital Dojo Live Shop Self Defense Gear Prepper Gear Ebooks Mugs and Tunblers Stickers and Decals Apparel Phone Cases Contact Memberships Donations Privacy Policy X Popular Frelaxy Dry Bag Review: The Ultimate Waterproof Gear for Survivalists Keep your gear dry no matter the conditions. When it comes to survival and outdoor adventures, keeping your gear dry is essential. Whether you’re trekking through the wilderness, caught in a torrential downpour, or navigating a river, a reliable dry bag can make all the difference. Enter the Frelaxy Dry Bag, a lightweight yet rugged solution designed to keep your essentials safe and dry in even the harshest conditions. But does it live up to the hype? Let’s dive in. Key Features 1. Premium Waterproof Protection The Frelaxy Dry Bag is made from 210T ripstop polyester with a waterproof PU coating, ensuring 100% waterproof protection against rain, splashes, and even full submersion. The roll-top closure with a reinforced strip creates an airtight seal, preventing moisture from creeping in. 2. Lightweight & Durable Despite its tough construction, the bag remains lightweight, making it ideal for backpackers, kayakers, and survivalists who need to minimize load weight. The reinforced seams add durability, allowing the bag to withstand rough handling in rugged environments. 3. Multiple Size Options Available in 1L, 2L, 5L, 10L, 20L, 30L, and 40L sizes, the Frelaxy Dry Bag offers versatility for different needs. Whether you need a small bag to store electronics or a larger one for clothing and food, there’s an option for every situation. 4. Easy to Use & Compact The roll-top closure system is simple and efficient—just fold, buckle, and go. Plus, when not in use, the bag compresses down to a compact size for easy storage. 5. Affordable Without Sacrificing Quality Unlike some premium dry bags that come with a hefty price tag, the Frelaxy Dry Bag offers an excellent balance of affordability and reliability, making it accessible for both seasoned survivalists and beginners. Survival Applications ✔️ Emergency Preparedness – Store important gear like fire-starting tools, first-aid kits, and extra clothing to keep them dry.✔️ Bug-Out Bags – Use as a dedicated waterproof compartment inside your bug-out bag.✔️ Water Crossings & Rafting – Perfect for keeping valuables safe when traversing rivers or kayaking.✔️ Rainy Expeditions – Protect electronics, documents, and food from unexpected downpours. Pros & Cons ✅ Pros: 100% waterproof protection Lightweight and durable Multiple size options Easy to pack and store Budget-friendly ❌ Cons: No built-in straps for carrying (needs attachment to other gear) Not puncture-proof (avoid sharp objects) Final Verdict: Is the Frelaxy Dry Bag Worth It? Absolutely! The Frelaxy Dry Bag delivers reliable waterproofing at an affordable price, making it a must-have for survivalists, campers, and outdoor enthusiasts. While it may not be the toughest dry bag on the market, it provides solid performance for general outdoor use and survival scenarios. If you need an effective, lightweight, and budget-friendly waterproof solution, this dry bag is an excellent choice. Would you trust your gear to the Frelaxy Dry Bag? Let us know in the comments! Listen to this article in audio format. Blog 19 Decoded 6 EDC 2 featured 0 Financial Freedom 3 Gardening 2 Follow on Spotify LEARN MORE ON YOUTUBE! ADVERTISEMENT Click here ADVERTISEMENT Learn More ADVERTISEMENT Learn More ADVERTISEMENT Learn More RELATED POST urbanwarriorsurvival.com 27 March 2025 Blog Prepping survival gear Frelaxy Dry Bag Review: The Ultimate Waterproof Gear for Survivalists urbanwarriorsurvival.com 26 March 2025 Blog Worse Case Scenario How to Find and Purify Water When Taps Stop Running urbanwarriorsurvival.com 25 March 2025 Blog Mental Health How to Train Your Mind for Long-Term Isolation urbanwarriorsurvival.com 24 March 2025 Blog Gardening Reasons You’re Not as Independent as You Think urbanwarriorsurvival.com 20 March 2025 Blog EDC Why the SABANI 35000mAh Power Bank is the Ultimate EDC Essential urbanwarriorsurvival.com 14 March 2025 Blog Gardening How to Start a Survival Garden in the City (Even with Limited Space) Address List 123, Any Street NorthYour City NameCountry Name. P.O 3554 +1 234 567 8902 Urban Warrior Survival Social Networks Facebook Twitter Instagram B.Roc Survival Podcast Discord Patreon Pinterest Youtube Links List Help Center Community Forums Blog Meetups B.Roc Survival Inc. All rights reserved
How to Find and Purify Water When Taps Stop Running

Home About Us Blog Mental Health Decoded Worse Case Scenario Technology Financial Freedom Self Defense featured Podcast Videos Shorts Self Defense Survival Motivation Herbal Remedies Videos Self Defense Survival Motivation Videos Conspiracy Videos Meditation & Relaxation Digital Dojo Digital Dojo Live Shop Self Defense Gear Prepper Gear Ebooks Mugs and Tunblers Stickers and Decals Apparel Phone Cases Contact Memberships Donations Privacy Policy X Popular How to Start a Survival Garden in the City (Even with Limited Space) Step-by-Step Guide to Locating and Making Water Safe in an Emergency Water is the most essential resource for survival, yet it is often taken for granted. In a worst-case scenario where municipal water systems fail, knowing how to find and purify water can mean the difference between life and death. This guide will walk you through practical steps to locate and make water safe for consumption. Step 1: Identifying Potential Water Sources When the taps stop running, your first priority is to find a reliable water source. Here are some options: Natural Sources: Rivers, lakes, ponds, and streams are primary options. Look for moving water whenever possible, as stagnant water is more likely to be contaminated. Rainwater Collection: Setting up tarps, buckets, or containers to collect rainwater is one of the safest and most effective methods of obtaining clean water. Underground Sources: Wells and underground springs are excellent, though accessing them without a pump may be challenging. Man-Made Sources: Water heaters, toilet tanks (not the bowl), and pipes still contain residual water that can be used in an emergency. Urban Water Sources: Public fountains, swimming pools (for non-drinking purposes unless properly purified), and even large plant leaves can provide some moisture. Step 2: Filtering Out Debris and Contaminants Water collected from any natural or unconventional source will likely contain dirt, debris, or harmful microorganisms. Before purification, filter the water to remove visible contaminants. Cloth Filtration: Pour the water through a clean cloth, coffee filter, or bandana to remove large particles. Homemade Sand and Charcoal Filter: Layer sand, gravel, and charcoal in a container and pour the water through it for additional filtering. Commercial Water Filters: If available, use portable water filtration systems like the LifeStraw or Sawyer Mini for an effective first layer of filtration. Step 3: Purifying the Water Even if the water looks clean, it can still contain bacteria, viruses, and parasites. Here are the best methods to purify it: Boiling: Bring water to a rolling boil for at least one minute (or three minutes at high altitudes). This is the most reliable way to kill harmful pathogens. Chemical Treatment: Bleach: Use unscented household bleach (5-6% sodium hypochlorite). Add 8 drops per gallon of clear water or 16 drops per gallon if the water is cloudy. Let it sit for 30 minutes before drinking. Iodine Tablets: Follow the manufacturer’s instructions. Iodine-treated water should be used temporarily, as long-term consumption can affect thyroid health. Solar Disinfection (SODIS): Fill a clear plastic or glass bottle with water and leave it in direct sunlight for at least six hours. The UV rays will kill most pathogens. Portable Water Purifiers: Devices like UV sterilization pens and pump filters with built-in purifiers are great for emergency use. Step 4: Storing and Preserving Clean Water Once water has been purified, it needs to be stored safely to prevent recontamination. Use Clean Containers: Store water in clean, food-grade containers with tight-sealing lids. Keep It in a Cool, Dark Place: Direct sunlight and heat can encourage bacterial growth in stored water. Label and Rotate Supply: If storing water for long-term use, label the containers with purification dates and rotate them every six months to maintain freshness. Step 5: Conserving and Maximizing Water Use When water is scarce, it is crucial to use it efficiently. Prioritize Drinking Water: Stay hydrated before using water for hygiene or cooking. Reuse When Possible: Water used for rinsing food can be repurposed for cleaning or watering plants. Minimize Waste: Use a damp cloth instead of running water for cleaning hands and face. Conclusion In an emergency situation where tap water is no longer available, knowing how to find and purify water is a critical survival skill. By identifying reliable water sources, filtering out debris, purifying effectively, and storing it properly, you can ensure a steady supply of safe drinking water. Preparedness is key—start practicing these techniques today to be ready for any situation. Listen to this article in audio format. Blog 18 Decoded 6 EDC 2 featured 0 Financial Freedom 3 Gardening 2 Follow on Spotify LEARN MORE ON YOUTUBE! ADVERTISEMENT Click here ADVERTISEMENT Learn More ADVERTISEMENT Learn More ADVERTISEMENT Learn More RELATED POST urbanwarriorsurvival.com 26 March 2025 Blog Worse Case Scenario How to Find and Purify Water When Taps Stop Running urbanwarriorsurvival.com 25 March 2025 Blog Mental Health How to Train Your Mind for Long-Term Isolation urbanwarriorsurvival.com 24 March 2025 Blog Gardening Reasons You’re Not as Independent as You Think urbanwarriorsurvival.com 20 March 2025 Blog EDC Why the SABANI 35000mAh Power Bank is the Ultimate EDC Essential urbanwarriorsurvival.com 14 March 2025 Blog Gardening How to Start a Survival Garden in the City (Even with Limited Space) urbanwarriorsurvival.com 13 March 2025 Blog EDC 5 Reasons Why Pepper Spray Is the Ultimate Self-Defense Tool Address List 123, Any Street NorthYour City NameCountry Name. P.O 3554 +1 234 567 8902 Urban Warrior Survival Social Networks Facebook Twitter Instagram B.Roc Survival Podcast Discord Patreon Pinterest Youtube Links List Help Center Community Forums Blog Meetups B.Roc Survival Inc. All rights reserved